
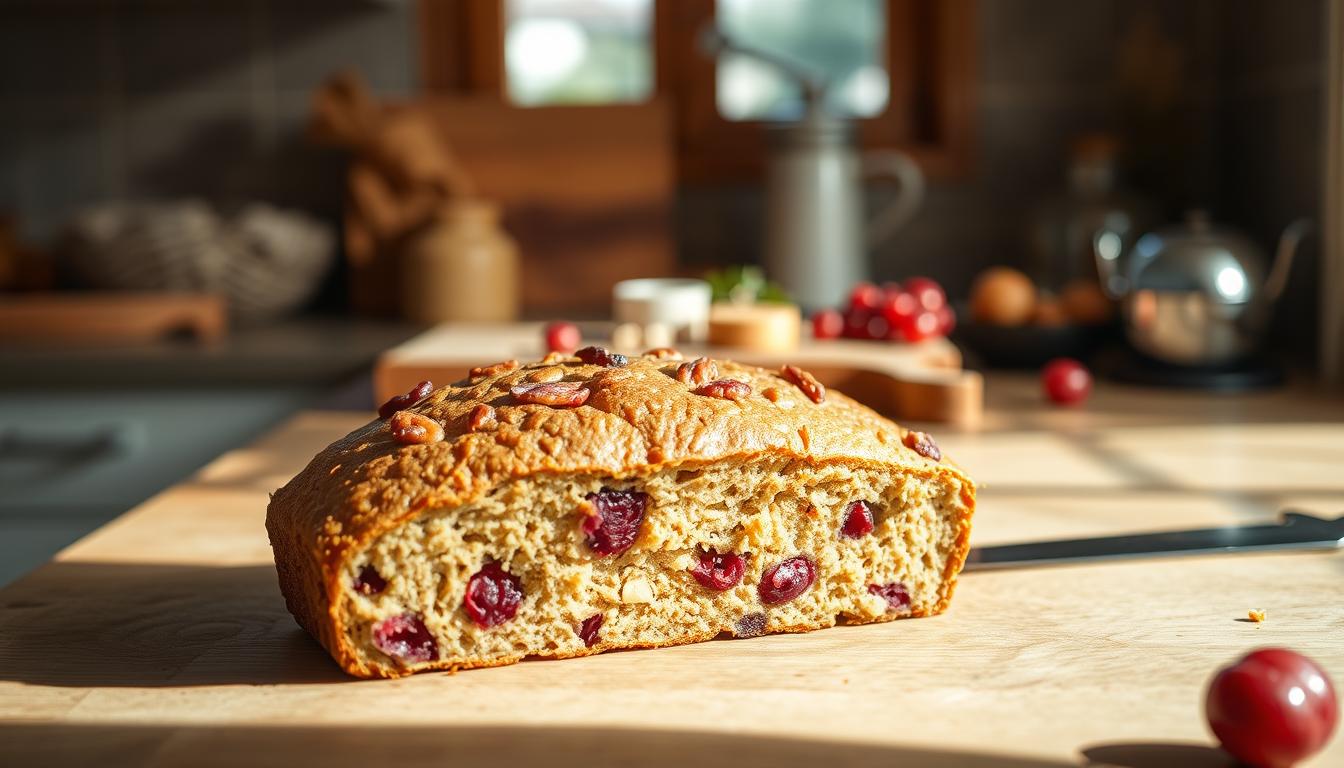
There’s something magical about the aroma of freshly baked goods filling your home. It’s a feeling of warmth, comfort, and joy that brings people together. Today, we’re diving into Cranberry Nut Bread recipe that promises just that—a cozy, flavorful creation perfect for any occasion.
This recipe combines the tangy sweetness of fresh cranberries with the satisfying crunch of nuts, creating a loaf that’s both memorable and delicious. Whether you’re a seasoned baker or just starting out, this guide will walk you through every step with ease.
From the first mix to the final slice, you’ll discover how simple it is to create a mouthwatering treat. Perfect for breakfast, snacks, or even as a thoughtful gift, this baked delight is sure to impress. Let’s get started on this flavorful journey!
Key Takeaways
- Create a cozy, flavorful baked treat with ease.
- Combines tangy cranberries and crunchy nuts for a unique taste.
- Perfect for breakfast, snacks, or gifting.
- Detailed steps and tips for bakers of all levels.
- Learn about ingredients, methods, and practical baking advice.
Introduction to Your Cranberry Nut Bread Journey
Every recipe has a story, and this one is no exception. This beloved baked treat has evolved over time, inspired by family traditions and shared experiences. Readers like Kris and Linda have called it “a keeper!”—a testament to its simplicity and flavor.

What makes this recipe stand out? It’s the perfect balance of tangy sweetness and satisfying crunch. With just a few ingredients and minimal prep time, you can create something truly special. Whether you’re a beginner or a seasoned baker, this guide will walk you through every step.
Discovering the Recipe’s Story
This recipe has its roots in family kitchens, where it was passed down through generations. The combination of fresh cranberries and nuts was a hit, and over time, it became a holiday favorite. Testimonials from home bakers highlight its versatility and ease of preparation.
What You Will Learn
In this section, you’ll discover:
- How to select the best ingredients, including tips for substitutions.
- Techniques for mixing, baking, and slicing your loaf to perfection.
- Practical advice for enhancing flavors, like adding a hint of orange zest.
Here’s a quick look at the key measurements you’ll need:
| Ingredient | Quantity |
|---|---|
| Fresh cranberries | 1 ½ cups |
| Nuts (walnuts or pecans) | ½ cup |
| Orange zest | 1 teaspoon |
| All-purpose flour | 2 cups |
From ingredient selection to the final slice, this journey is designed to be simple and rewarding. Let’s dive in and create something delicious together!
Essential Ingredients & Ingredient Substitutions
The right ingredients can transform a simple recipe into a masterpiece. Whether you’re a seasoned baker or just starting out, understanding the essentials and their alternatives ensures a delicious and consistent result. Let’s dive into the key components and their substitutions.
Fresh vs. Dried Cranberries and Nut Choices
Fresh cranberries bring a tangy burst of flavor, perfect for a vibrant taste. Dried cranberries, on the other hand, offer a sweeter, chewier texture. Use fresh ones for a zesty loaf or dried for a softer bite. Both work well, so choose based on your preference.
When it comes to nuts, walnuts and pecans are popular choices. Walnuts add a robust crunch, while pecans bring a buttery richness. Experiment with different types to find your favorite combination.

Alternatives for Flour, Yeast, and Other Essentials
If you’re out of all-purpose flour, bread flour is a great substitute. It yields a slightly chewier texture. For a healthier twist, replace up to 1 cup of flour with whole-wheat flour, but avoid using it entirely to prevent a dense loaf.
For yeast-free recipes, baking powder and baking soda can do the trick. A teaspoon baking measurement ensures the perfect rise. If you’re avoiding butter, vegetable oil works just as well, maintaining moisture and flavor.
Here’s a quick guide to the essential ingredients and their substitutes:
| Ingredient | Quantity | Substitute |
|---|---|---|
| All-purpose flour | 2 cups | Bread flour or 1 cup whole-wheat flour |
| Fresh cranberries | 1 ½ cups | Dried cranberries (¾ cup) |
| Walnuts | ¾ cup | Pecans or almonds |
| Butter | ½ cup | Vegetable oil or coconut oil |
Precise measurements and quality ingredients are crucial for the perfect loaf. With these tips and substitutions, you can adapt the recipe to suit your needs while maintaining its delightful flavor.
Step-by-Step Baking Process
The journey from mixing to baking is where the magic truly happens. Follow these steps to create a loaf that’s golden, moist, and bursting with flavor. With a little patience and attention to detail, you’ll master the process in no time.
Mixing and Preparing the Dough
Start by preheating your oven to 450°F (230°C). This ensures the pan heats evenly for consistent baking. Grease your pan with a light layer of fat to prevent sticking. A well-prepared pan is key to a perfect loaf.
In a large bowl, combine the dry ingredients: flour, baking soda, and salt. Mix them thoroughly to avoid clumps. Add the wet ingredients gradually, stirring until the dough comes together. If the dough feels sticky, don’t worry—this is normal.
Baking, Cooling, and Slicing Techniques
Transfer the dough to the prepared pan and smooth the top with a spatula. Bake for 20 minutes with steam, then remove the steam source and continue baking for another 30 minutes. This creates a golden, crispy crust.
To check for doneness, insert a toothpick into the center. If it comes out clean, your loaf is ready. Let it cool in the pan for 10 minutes, then transfer it to a wire rack. Allow it to cool for at least an hour before slicing. This ensures the texture remains perfect.
For clean slices, use a serrated knife and cut gently. Serve warm or store in an airtight container for up to 5 days. Enjoy your freshly baked creation!
Techniques for Perfect Cranberry Nut Bread
Mastering the art of baking requires both technique and patience. This section focuses on two critical aspects: handling sticky dough and achieving a golden, crispy crust. With the right methods, you can create a loaf that’s both visually appealing and delicious.
Handling Sticky Dough with Confidence
Sticky dough can be tricky, but it’s a sign of proper hydration. Avoid adding extra flour, as it can dry out the mixture. Instead, use a lightly greased bowl to let the dough rest. This preserves moisture and ensures a soft texture.
When mixing, incorporate ingredients like egg and walnut gradually. These elements bind the dough and add flavor. Trust the process—minimal hands-on time often yields the best results.
Achieving a Golden, Crispy Crust
For a crispy crust, use a Dutch oven. Its heavy lid traps steam, creating the perfect environment for baking. Preheat the oven to 350°F and bake for the recommended day to ensure even cooking.
Add a teaspoon baking soda to the dough for a slight rise and golden color. Let the loaf cool completely before slicing. This step ensures the crust remains intact and the texture stays perfect.
With these techniques, you’ll create a loaf that’s both flavorful and visually stunning. Happy baking!
Tips for Flavor and Texture Enhancements
Small tweaks can make a big difference in your baked goods. By focusing on key ingredients and techniques, you can elevate the taste and texture of your loaf. Let’s explore how to enhance flavors like orange zest and honey while maintaining the perfect balance.
Boosting Orange Zest and Honey Flavors
Orange zest adds a bright, citrusy note that complements the natural sweetness of honey. To amplify these flavors, use a tablespoon of freshly grated zest and a drizzle of honey. Be sure to mix them evenly in a large bowl for consistent distribution.
Here are some practical tips:
- Add 1-2 teaspoons of orange zest for a stronger citrus flavor.
- Use a tablespoon of honey to enhance sweetness without overpowering.
- Combine ingredients in a large bowl to ensure even mixing.
Adjusting Ingredient Ratios for Better Texture
Subtle changes in ingredient ratios can significantly impact texture. For example, reducing saturated fat by using healthier alternatives can create a lighter loaf. Adding a teaspoon salt enhances flavor without making it too salty.
To improve texture:
- Use a cooling rack post-baking to maintain crust integrity.
- Measure ingredients like tablespoon levels accurately for consistency.
- Let the loaf cool completely on a rack before slicing.
By carefully adjusting measurements and using the right tools, you can create a loaf that’s both flavorful and perfectly textured. Happy baking!
Troubleshooting and Pro Tips
Even the most experienced bakers encounter challenges in the kitchen. From uneven rising to sticky dough, small issues can sometimes derail your baking process. But with the right tips and adjustments, you can overcome these hurdles and create a consistently delicious loaf.
Addressing Common Baking Challenges
One of the most frequent issues is uneven rising. This often happens if the dough isn’t proofed long enough or if the yeast isn’t activated properly. To fix this, ensure your yeast is fresh and proof the dough for 12-18 hours at 65°-70°F.
Sticky dough can also be frustrating. Instead of adding extra flour, which can dry out your loaf, let the dough rest in a lightly greased bowl. This preserves moisture and helps achieve a soft texture.
Adjusting Bake Times and Temperature
Every oven is different, so bake times and temperatures may need adjustments. If your oven runs hot, reduce the temperature by 10°F. For a golden crust, preheat oven to 425°F and bake covered for 30 minutes, then uncovered for 15-20 minutes.
Dark-colored Dutch ovens absorb more heat, so reduce the temperature to 400°F to prevent over-browning. Always check the internal temperature of your loaf—it should reach 195°F for perfect doneness.
Secrets for a Consistently Delicious Loaf
To balance flavors and textures, control the sodium content by reducing salt slightly and adding a hint of honey. This enhances sweetness without overpowering the natural taste of your food.
For a healthier option, increase fiber by using whole-wheat flour for up to half of the total flour. This adds nutrients without compromising the texture. Finally, let your loaf cool completely on a wire rack before slicing to maintain its structure.
With these pro tips, you’ll be equipped to handle any baking challenge and create a loaf that’s both flavorful and consistent every time.
Conclusion
Baking is both an art and a science, and this recipe proves how simple it can be to create something extraordinary. From selecting quality dry ingredients to mastering the preheat process, every step is designed for success. Precise measurements ensure the perfect balance of flavors, while techniques like checking the center for doneness guarantee consistent results.
This loaf is not just delicious but also nutritionally balanced. With a focus on protein and fiber, it’s a treat you can feel good about. The cranberry orange combination adds a refreshing twist, and a touch of baking powder ensures a light, airy texture.
Feel free to experiment with flavors, but always refer back to the foundational tips. Whether you’re baking for breakfast or sharing with friends, this recipe promises a comforting experience. Celebrate every golden, crunchy bite and enjoy the joy of homemade goodness!